java的字节码工具-javassist初体验
前面那篇在讲agent的时候用到了javassist,我们就来简单讲个demo
我想用javassist来创建一个类1
2
3
4
5
6
7public static void createEntity() throws Exception {
ClassPool pool = ClassPool.getDefault();
CtClass cl = pool.makeClass("Entity");
CtConstructor cons = new CtConstructor(new CtClass[]{}, cl);
cl.addConstructor(cons);
cl.writeFile();
}
这个代码可以给我们创建一个Entity类, 带有一个无参的构造函数,默认在项目根目录下会生成Entity类的class文件
但是其实这个也是不必要的,默认会给生成一个无参的构造函数
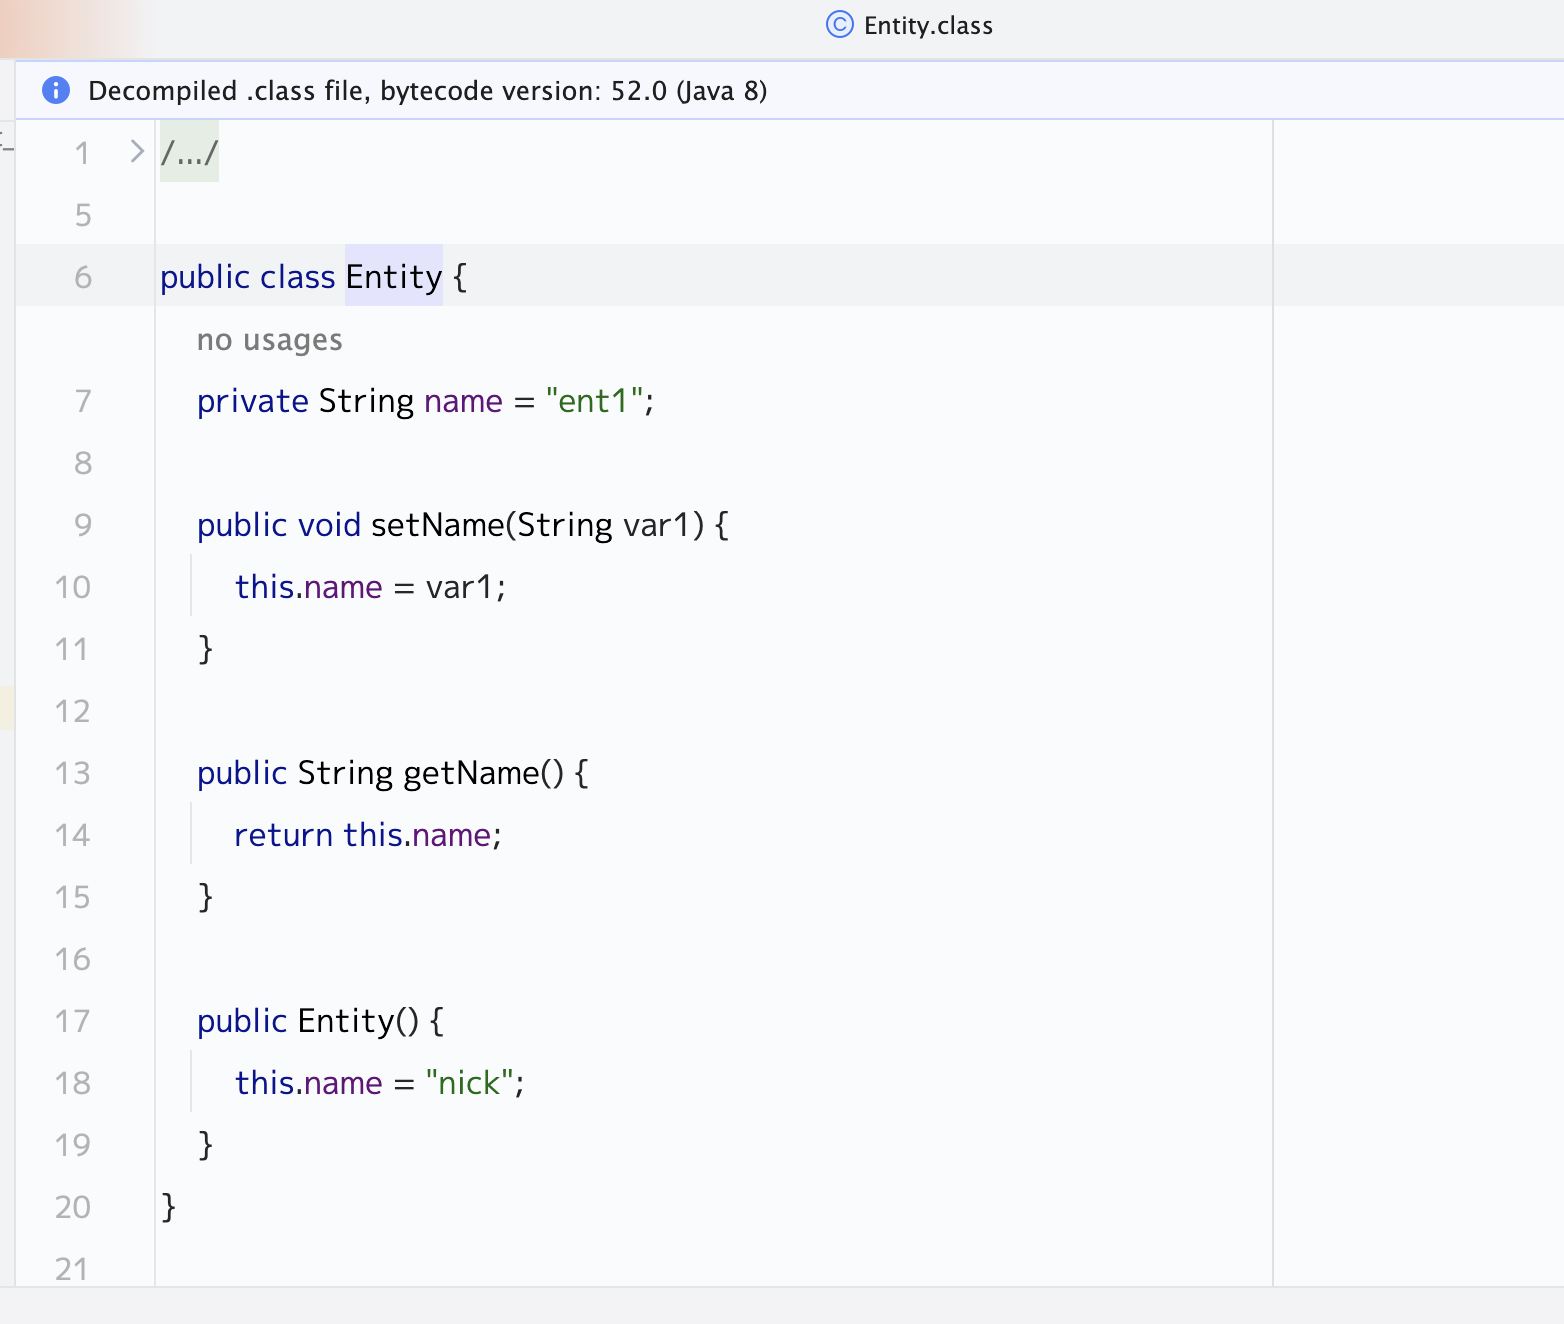
然后我们可以给这个类加个字段, 加在 writeFile 方法调用前1
2
3CtField param = new CtField(pool.get("java.lang.String"), "name", cl);
param.setModifiers(Modifier.PRIVATE);
cl.addField(param, CtField.Initializer.constant("ent1"));
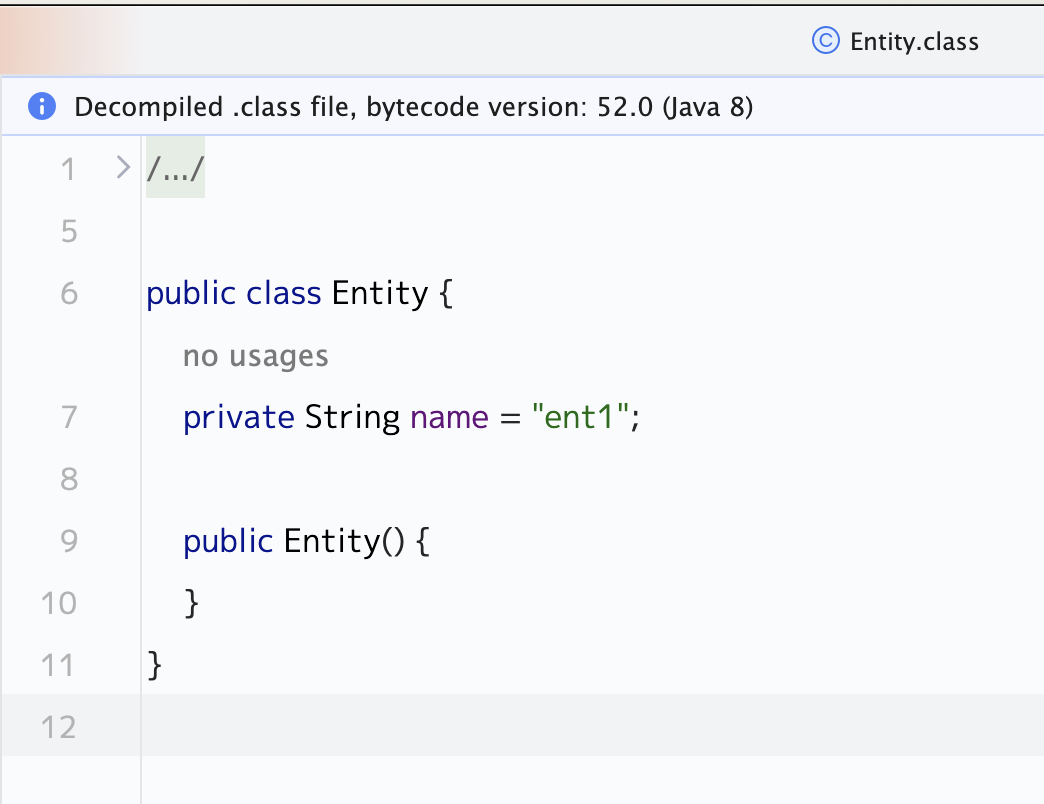
我们就生成了这样一个类
javassist也已经提供好了1
2cl.addMethod(CtNewMethod.setter("setName", param));
cl.addMethod(CtNewMethod.getter("getName", param));
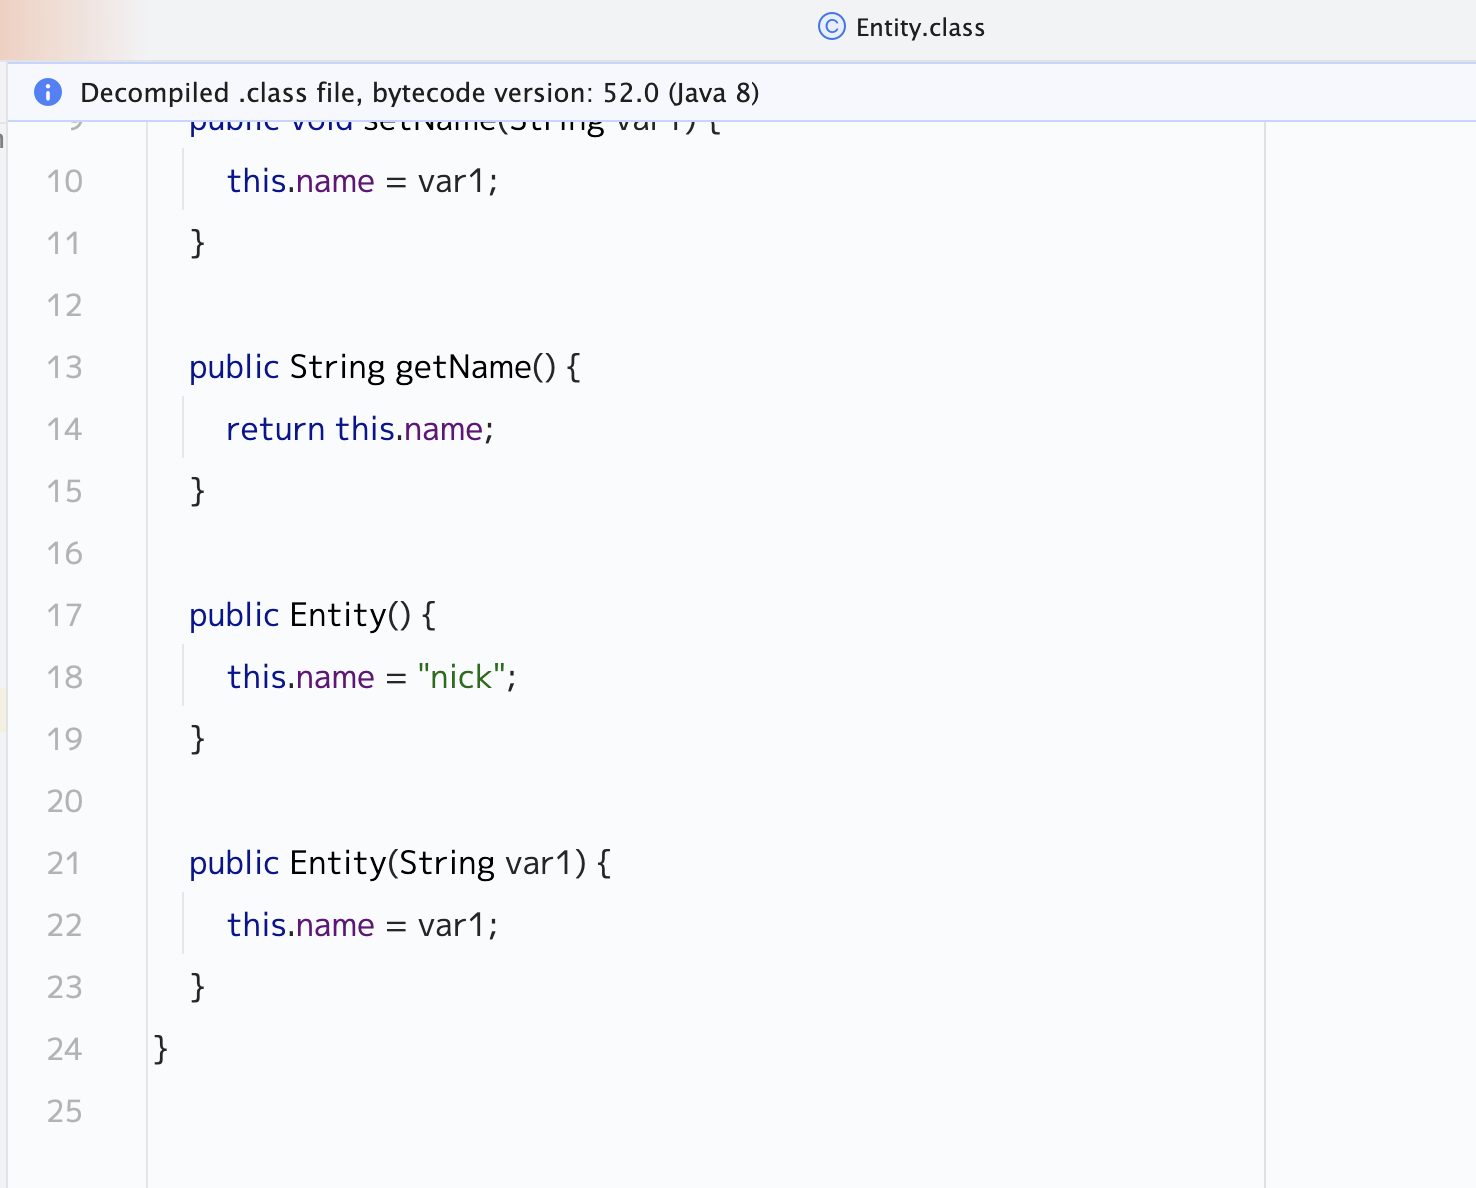
我们生成的类就变成这样了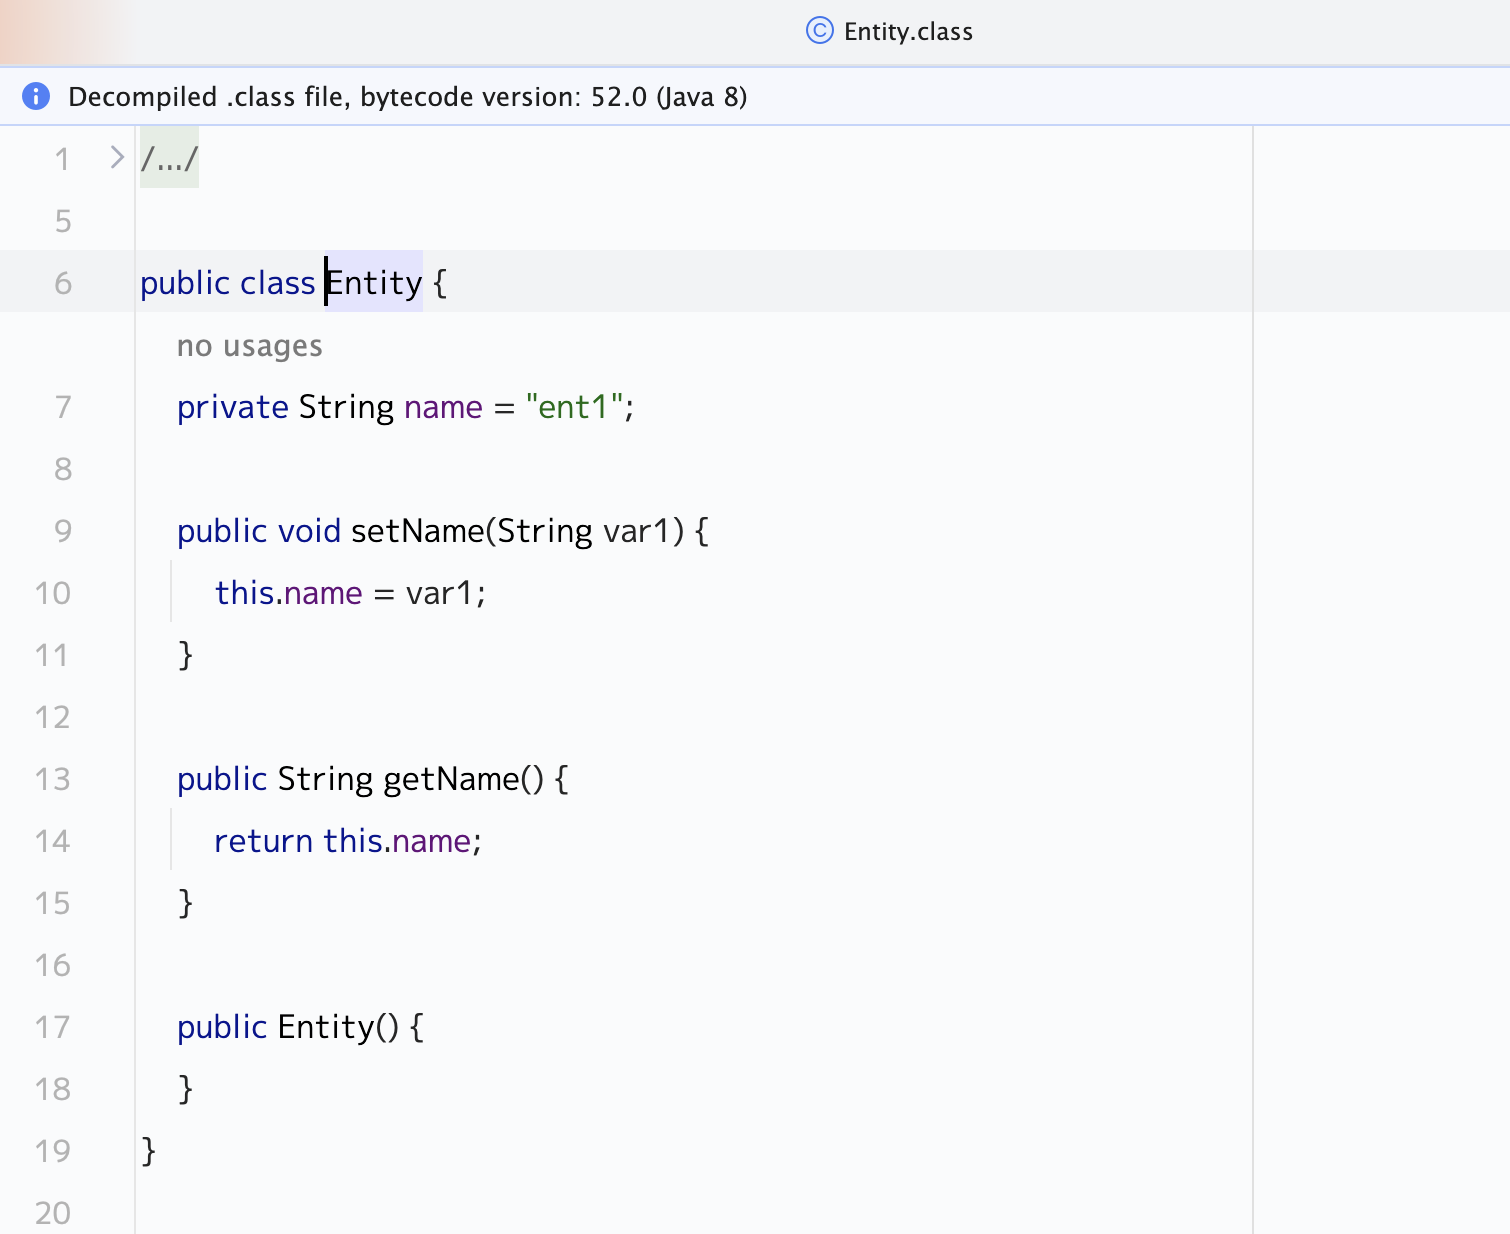
接下去我们可以再加一个默认赋值的无参构造函数1
2
3
4CtConstructor con = new CtConstructor(new CtClass[]{}, cl);
// 需要转义下
con.setBody("{name = \"nick\";}");
cl.addConstructor(con);
然后我们就有了这样的类,带有一个默认赋值的构造函数,接下去可以来个带参数的构造函数1
2
3
4con = new CtConstructor(new CtClass[]{pool.get("java.lang.String")}, cl);
// $0=this / $1,$2,$3...指的是参数,$1代表第一个参数
con.setBody("{$0.name = $1;}");
cl.addConstructor(con);
最后我们可以再加个打印该字段的方法1
2
3
4CtMethod ctMethod = new CtMethod(CtClass.voidType, "printName", new CtClass[]{}, cl);
ctMethod.setModifiers(Modifier.PUBLIC);
ctMethod.setBody("{System.out.println(name);}");
cl.addMethod(ctMethod);
这样我们就获得了这样一个类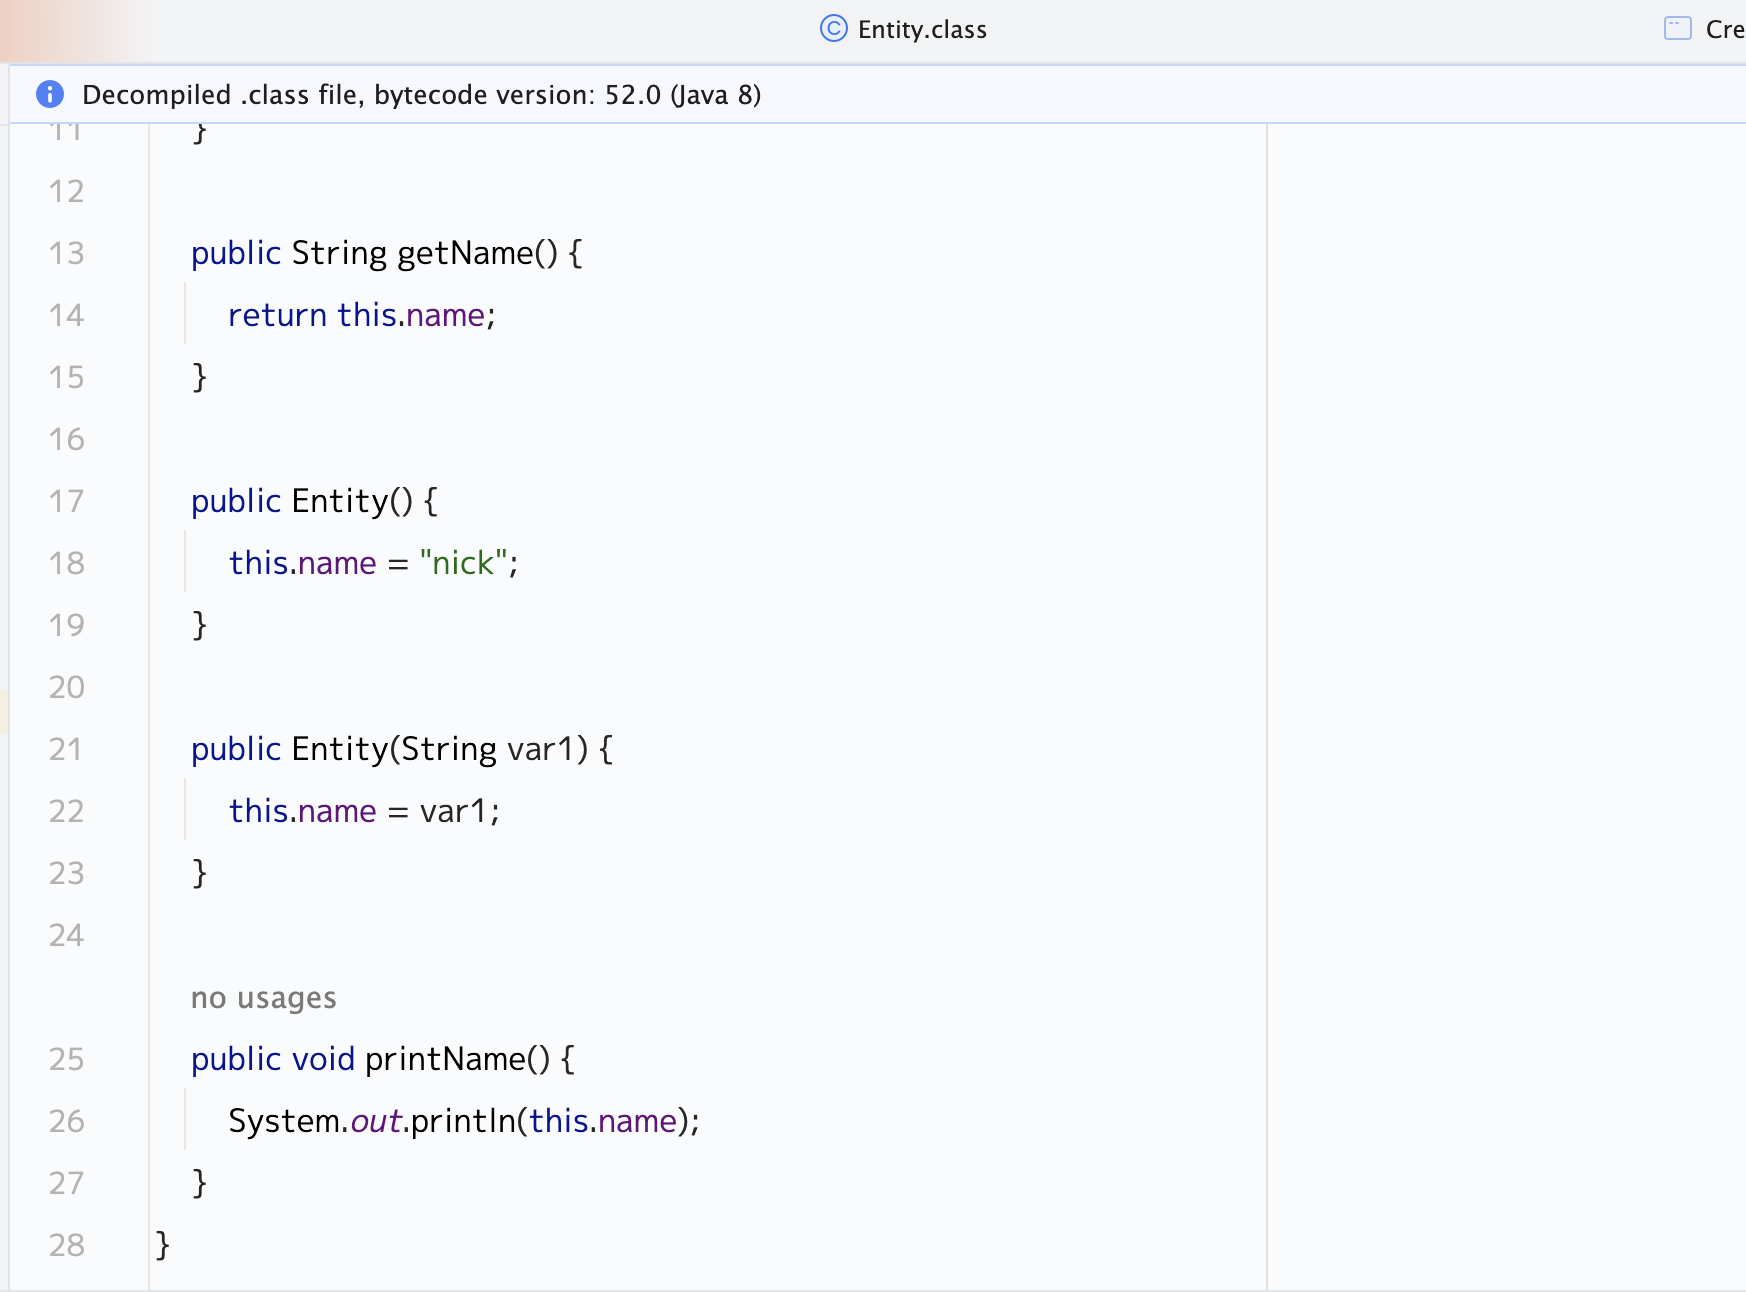
这只是javassist的简单使用,它还有很多强大的功能可以在官方文档和网上的资料进行学习